Last updated: August 12, 2026
Cleaning kegerator lines is the maintenance chore that separates good home draft from disappointing home draft. Beer is food, and the inside of a beer line is a warm-adjacent, sugar-rinsed tube where residue, minerals, and eventually off flavors build up quietly. When a fresh keg tastes stale or the pour turns oddly foamy, the line is the usual suspect.
The fix is a fifteen to twenty minute routine with simple gear, and once you have done it twice it becomes as unremarkable as descaling a coffee machine. This guide walks through the full sequence, faucet included, plus how often to do it and the mistakes that make people dread a job that should be easy.
Quick Answer
How do you clean kegerator lines?
- Disconnect the keg and CO2, then pump or pressure-flush a beer line cleaning solution through the line, faucet to coupler, following the cleaner’s label.
- Disassemble and scrub the faucet and coupler separately; they collect the most residue.
- Rinse thoroughly with clean water, reassemble, and retap. Commonly recommended rhythm: between every keg, or every couple of weeks.
The Line Cleaning Routine, Step by Step
Save this sequence for keg-change day. It assumes a standard single tap setup with a hand pump or pressurized cleaning bottle; a dual tap simply repeats the flush for the second line in the same session.
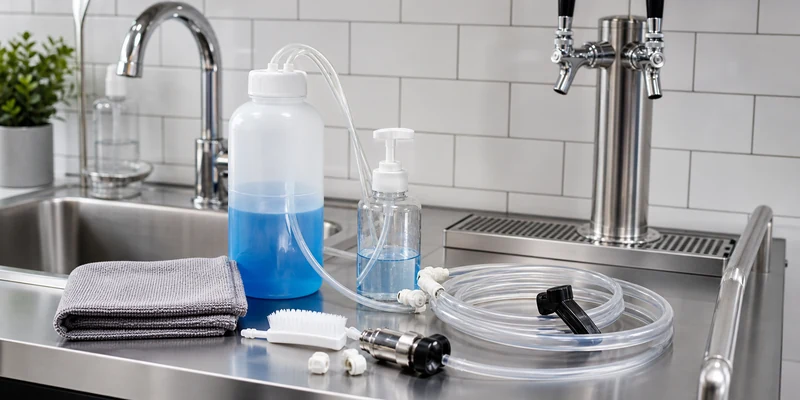
- Gather the kit. A beer line cleaning kit (hand pump or pressurized bottle), beer line cleaning solution, a faucet wrench, a small brush set, a bucket, and clean towels. Wear gloves and eye protection: line cleaners are typically alkaline chemicals that deserve respect, so follow the label on the bottle.
- Shut down and disconnect. Close the CO2 tank valve, pull the pressure relief on the coupler to vent the line, and disconnect the coupler from the keg. Leave the keg sealed; it is fine without gas for the duration.
- Remove the faucet. Use the faucet wrench to unscrew the faucet from the tower shank, then take the faucet apart into its few components. This is the step most people skip and the place most gunk lives.
- Flush with warm water. Run warm water through the line from the cleaning pump, faucet end to coupler end, until it runs clear into the bucket. This clears loose beer before the cleaner goes in.
- Run the cleaning solution. Mix the line cleaner per its label, fill the pump or bottle, and push the solution through the full line and coupler. Let it work for the contact time the product specifies, then push the remainder through.
- Scrub the small parts. While the solution sits, brush the faucet components and the coupler, including the probe and the pressure relief, in a bowl of the same solution. Rinse them in clean water.
- Rinse the line thoroughly. Flush clean water through the line until nothing but water comes out, and give it a little extra beyond that. Any cleaner left behind ends up in the first pour, so this step gets no shortcuts.
- Reassemble and retap. Reassemble the faucet, screw it back onto the shank, reconnect the coupler to the keg, open the CO2, and check the fittings with a quick look and a sniff for leaks. Pour and discard the first small glass, then pour one to verify a clean, normal pour.
What the Job Actually Takes
The routine above needs three things. Bought once, they turn line cleaning from a chore you postpone into a job you finish before the next round.


How Often, Honestly
The rhythm commonly recommended in the draft trade is every two weeks, and at minimum between every keg. Home setups pour less than bars, but the line does not care about volume as much as time: residue and mineral deposits accumulate whether or not beer is moving. Between-keg cleaning is the natural anchor, since the system is already open, and a calendar reminder covers long-lived half barrels that outlast the two week mark.
Two additions to the rhythm are worth knowing. First, deep-clean the coupler and faucet on the same schedule rather than annually; they are where the routine pays off most visibly. Second, the lines themselves are consumables: standard vinyl beer line gets stained and tired over time, and replacing it periodically, an inexpensive job with parts from any draft supplier, resets the system to day-one taste. If the line looks discolored after a proper clean, that is its resignation letter.
Why Dirty Lines Ruin Beer
Three different problems build up inside a neglected line, and each shows up differently in the glass. Organic residue from the beer itself feeds off flavors, the sour and buttery notes that make a fresh keg taste old. Mineral scale, sometimes called beer stone, builds a rough layer that both harbors residue and gives CO2 nucleation points, which reads as mystery foam that no pressure adjustment cures. And any biofilm that establishes itself makes both problems worse and faster.
This is why cleaning beats troubleshooting: a huge share of home draft complaints, foamy pours, stale taste with a fresh keg, a faucet that sticks, trace back to the line and faucet rather than the regulator people instinctively reach for. Clean first, then adjust; the same logic that governs temperature in our kegerator guide applies to the line side too.
Common Mistakes to Avoid
- Skipping the faucet disassembly. Flushing the line while leaving a gunked faucet in place is half a job. The faucet is where residue concentrates and where sticky handles are born.
- Under-rinsing. Cleaning solution is not a flavor. Rinse until clear, then rinse a little more, and discard the first pour after reassembly.
- Using household cleaners in the line. Dish soap leaves film and kills foam heads; improvised chemicals leave worse. Use a purpose-made beer line cleaner and follow its label.
- Cleaning the line and never the coupler. The coupler sits in the keg’s beer path. Brush it, probe and relief valve included, every session.
- Waiting for bad taste to schedule cleaning. By the time you taste it, the line has been overdue for a while. Anchor the routine to keg changes or the calendar.
- Ignoring tired vinyl. Permanently stained or hazy line will not come back to neutral. Replace it and start fresh.
Make It a System
The owners who keep great draft for years all do the same thing: they turn cleaning from a decision into a default. Keep the kit and cleaner on top of or beside the kegerator, tie the routine to every keg swap, and log nothing more complicated than a date on a piece of tape. A dual tap setup doubles the lines but not the effort, as both flush in one session; the layout details are in our dual tap kegerator guide. And if you are converting a fridge yourself, build the cleaning habit in from the first keg, since a converted system, as covered in the conversion kit guide, needs exactly the same care as a factory unit.
Frequently Asked Questions
How often should kegerator lines be cleaned? The commonly recommended rhythm is every two weeks, and at minimum between every keg. Time matters more than volume, so a slow-drinking half barrel still earns a mid-keg clean.
What do I clean beer lines with? A purpose-made beer line cleaning solution, typically alkaline, pushed through with a hand pump or pressurized cleaning bottle, mixed and timed per the product label. Not dish soap, not vinegar improvisations.
Why does my beer taste bad even with a new keg? Most often the line or faucet, not the beer: residue and beer stone in the line flavor every pour that passes through. A full clean, faucet included, is the first fix to try.
Do I need to take the faucet apart? Yes. The faucet collects the most residue in the whole system and is the source of sticky handles and first-pour off flavors. A faucet wrench and two minutes cover it.
When should beer lines be replaced instead of cleaned? When vinyl line stays stained, hazy, or smelly after a proper clean. Replacement line is inexpensive, and many owners simply swap it periodically as cheap insurance.
The Bottom Line
Clean kegerator lines are a fifteen minute routine: flush, run a proper line cleaner through, scrub the faucet and coupler, rinse generously, and retap. Anchor it to every keg change or a two week rhythm, and replace tired vinyl line when cleaning stops bringing it back. It is the least glamorous part of home draft and the one your guests taste in every pour.